

Changing the pose of a half female mannequin is not only an art but also a practical skill that can significantly enhance the visual appeal of your retail display. As a supplier of high - quality half female mannequins, I have witnessed firsthand how a well - posed mannequin can attract customers and boost sales. In this blog, I will share some professional tips on how to change the pose of a half female mannequin effectively.
Understanding the Basics of Mannequin Poses
Before you start changing the pose of your half female mannequin, it's essential to understand the basic principles of mannequin posing. A good pose should be natural, engaging, and reflective of the target customer's lifestyle. For example, if you're selling casual wear, a relaxed and laid - back pose might be more appropriate. On the other hand, if you're showcasing formal attire, a more upright and elegant pose would be ideal.
There are several common types of poses for half female mannequins. The "stand - alone" pose is the most basic, where the mannequin stands straight with both feet together. This pose is great for highlighting the overall silhouette of the clothing. The "leaning" pose, where the mannequin leans slightly to one side, can add a sense of movement and dynamism. The "crossed - arm" pose can convey confidence and sophistication.
Tools Required for Changing Poses
To change the pose of a half female mannequin, you'll need a few tools. Firstly, a pair of soft - tipped pliers can be very useful for adjusting the joints of the mannequin. Soft - tipped pliers prevent damage to the mannequin's surface while allowing you to grip and manipulate the joints effectively. Secondly, a small rubber mallet can come in handy for gently tapping the joints into place. It helps to ensure that the joints are properly aligned and locked in the desired position.
Step - by - Step Guide to Changing the Pose
- Assess the Current Pose
- Take a close look at the current pose of the mannequin. Note any areas that need adjustment, such as joints that are too stiff or misaligned. This initial assessment will help you plan the new pose and identify the joints that need to be worked on.
- Prepare the Mannequin
- If the mannequin is wearing clothing, carefully remove it to avoid any damage during the pose - changing process. Place the clothing aside in a safe and organized manner.
- Loosen the Joints
- Use the soft - tipped pliers to gently loosen the joints of the mannequin. Start with the larger joints, such as the shoulders and hips. Apply gentle pressure to the joint's locking mechanism to release it. Be careful not to apply too much force, as this could damage the mannequin.
- Position the Limbs
- Once the joints are loose, you can start positioning the limbs. For example, if you want to create a leaning pose, gently move the torso of the mannequin to the desired angle. Then, adjust the arms and legs accordingly to maintain balance and a natural look. You can refer to real - life human poses for inspiration to make the mannequin's pose as realistic as possible.
- Lock the Joints
- After positioning the limbs, use the pliers to lock the joints in place. Make sure each joint is securely locked to prevent the mannequin from losing its pose over time. You can use the rubber mallet to give a gentle tap to the joints to ensure they are fully seated.
- Re - dress the Mannequin
- Once the new pose is set, carefully put the clothing back on the mannequin. Adjust the clothing to fit the new pose, making sure there are no wrinkles or creases that could detract from the overall look.
Tips for Creating Eye - Catching Poses
- Tell a Story: Try to create a pose that tells a story about the clothing or the brand. For example, if you're selling beachwear, a pose where the mannequin is holding a beach towel or a pair of sunglasses can create a more immersive experience for the customer.
- Vary the Poses: Don't use the same pose for all your mannequins. Vary the poses to create a more interesting and dynamic display. You can mix and match different poses, such as standing, sitting, and leaning, to add variety.
- Consider the Lighting: The lighting in your store can have a big impact on how the mannequin's pose is perceived. Make sure the lighting highlights the key features of the pose and the clothing. For example, side lighting can create shadows that enhance the three - dimensional effect of the pose.
Our Range of Half Female Mannequins
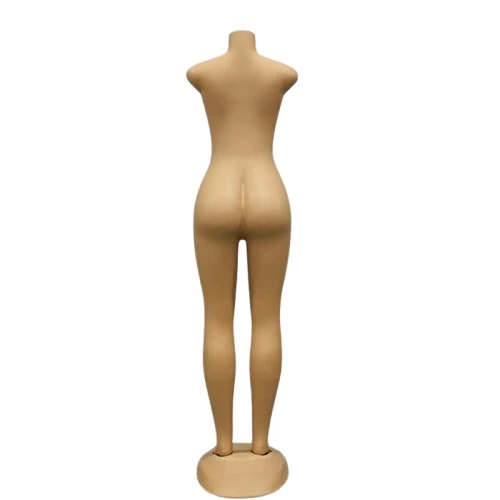
As a leading supplier of half female mannequins, we offer a wide range of products to meet your needs. Our Curvy Women's Mannequin is designed to showcase the curves of women's clothing in the most flattering way. With its realistic shape and high - quality materials, it can bring your fashion displays to life.
We also have a great selection of Plastic Female Mannequin. These mannequins are not only durable but also lightweight, making them easy to handle when changing poses. And if you're looking for a cost - effective option, our Plastic Mannequin For Sale is a great choice.

Contact Us for Your Mannequin Needs
If you're interested in purchasing our half female mannequins or need more information on changing their poses, we'd love to hear from you. Our team of experts is always ready to assist you with your retail display requirements. Whether you're a small boutique owner or a large - scale retailer, we can provide you with the right mannequins and advice to make your displays stand out.
References
- Fashion Display and Visual Merchandising, Second Edition by Kris J. Deloach
- Visual Merchandising: From Concept to Creation by Patrick J. McDonough