

Assembling a standard ladies mannequin is a task that requires a bit of patience and attention to detail. As a supplier of Standard Ladies Mannequin, I've had the opportunity to see firsthand how important it is to assemble these mannequins correctly. In this blog post, I'll guide you through the step - by - step process of assembling a standard ladies mannequin, ensuring that you can set it up efficiently and effectively.
Pre - Assembly Preparation
Before you start the actual assembly, it's crucial to gather all the necessary tools and parts. Most standard ladies mannequins come with a set of instructions, but it's always a good idea to have a general understanding of what's involved.
First, lay out all the parts of the mannequin on a clean, flat surface. This will allow you to easily identify each piece and ensure that nothing is missing. Common parts include the torso, legs, arms, and a base. You may also need tools such as screwdrivers, depending on the type of fasteners used in the assembly.
Inspect each part carefully for any signs of damage or defects. If you notice any issues, contact the supplier immediately. As a supplier, we always strive to provide high - quality products, but sometimes minor problems can occur during shipping.
Step 1: Attaching the Base
The base is the foundation of the mannequin, providing stability. Start by placing the base on the floor in the desired location. Make sure the area is level; an uneven surface can cause the mannequin to wobble.
If your base has adjustable feet, adjust them so that the base is perfectly flat. Some bases come with pre - drilled holes for attaching the torso. If this is the case, align the holes on the bottom of the torso with those on the base.
Insert the appropriate fasteners (screws or bolts) through the holes and tighten them using a screwdriver or wrench. Be careful not to overtighten, as this could damage the base or the torso.
Step 2: Assembling the Torso
In some cases, the torso may come in multiple pieces that need to be assembled. If so, carefully align the pieces according to the instructions. There are usually markings or grooves to help you with the alignment.
Use the provided fasteners to secure the pieces together. This may involve inserting pins or screws. Make sure the joints are tight to ensure the stability of the mannequin.
Once the torso is fully assembled, check for any gaps or misalignments. If there are any issues, double - check the alignment and re - tighten the fasteners as needed.
Step 3: Attaching the Arms
The arms of a standard ladies mannequin are typically designed to be removable. This allows for easy dressing and display adjustments. Start by identifying the correct arm for the left and right side.
There are usually sockets on the torso where the arms are meant to be attached. Insert the end of the arm into the socket and twist or push it in until it is firmly in place. Some arms may require you to use a small screw to secure them further.
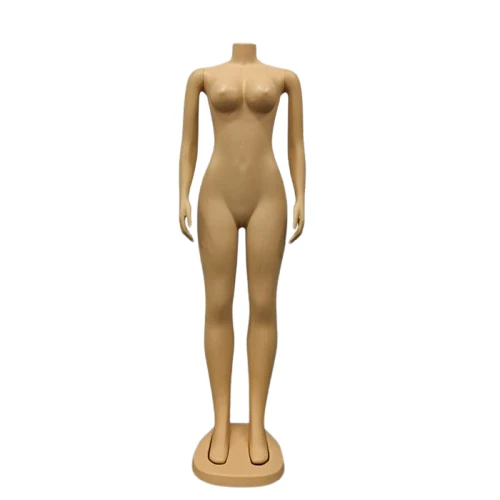

Test the movement of the arms to make sure they are attached properly and can move freely within the intended range of motion. If an arm is too loose or too tight, you may need to readjust the attachment.
Step 4: Attaching the Legs
Similar to the arms, the legs are also usually removable. Identify the left and right legs and locate the sockets on the bottom of the torso.
Insert the legs into the sockets and ensure they are fully seated. Some mannequins may have locking mechanisms to keep the legs in place. Follow the instructions to engage these mechanisms if necessary.
Once the legs are attached, stand the mannequin up and check its balance. If the mannequin leans to one side, it may be due to improper leg attachment or an uneven base. Adjust the legs or the base as needed.
Step 5: Final Checks
After the mannequin is fully assembled, give it a final inspection. Check all the joints and fasteners to make sure they are tight. Look for any signs of damage or misalignment that may have occurred during the assembly process.
Try dressing the mannequin with a simple piece of clothing to test its functionality. Make sure the arms and legs can move enough to accommodate different clothing styles.
Additional Considerations
If you're interested in different types of mannequins, we also offer Curvy Female Manenquin and Full Body Headless Mannequin. These mannequins have unique features and may require slightly different assembly processes. Always refer to the specific instructions provided with each product.
Maintenance Tips
Once your standard ladies mannequin is assembled, proper maintenance is essential to ensure its longevity. Keep the mannequin clean by wiping it down regularly with a soft, dry cloth. Avoid using abrasive cleaners or chemicals that could damage the surface.
If you need to move the mannequin, be careful not to put too much stress on the joints. Lift it by the torso or the base to prevent any parts from coming loose.
Contact for Purchase
If you're in the market for a standard ladies mannequin or any of our other products, we'd love to hear from you. Whether you're a retailer looking to display your latest fashion collection or a designer wanting to showcase your creations, our mannequins are the perfect choice. Reach out to us for more information, pricing, and to discuss your specific requirements. We're here to help you make the best decision for your business.
References
- General knowledge of mannequin assembly from years of experience as a mannequin supplier.