

Hey there! As a supplier of buff mannequins, I'm stoked to share with you how to assemble one of these bad boys. Whether you're a store owner looking to showcase your latest men's apparel or a collector wanting to add a cool piece to your collection, assembling a buff mannequin is a pretty straightforward process if you follow the right steps.

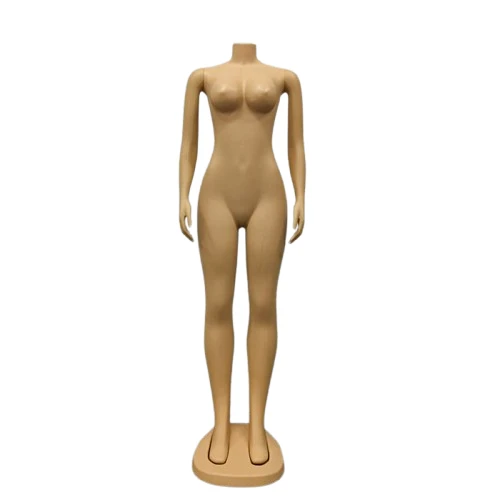
What You'll Need
First things first, let's talk about what you'll need to get the job done. Most buff mannequins come in a box with several parts, and you'll typically need a few basic tools. Here's a quick list:
- The mannequin parts: This usually includes the torso, arms, legs, and sometimes a head. Make sure all the parts are present and undamaged before you start.
- A Phillips head screwdriver: You'll use this to tighten the screws that hold the mannequin together.
- A pair of pliers: These can come in handy for holding small parts in place while you're screwing them together.
- A soft cloth: You'll want to use this to clean the mannequin parts before assembly to remove any dust or debris.
Step 1: Unpack and Inspect
Once you've got your tools ready, it's time to unpack the mannequin. Carefully remove all the parts from the box and lay them out on a clean, flat surface. Take a good look at each part to make sure there are no cracks, chips, or other damage. If you notice any issues, contact the supplier right away to get a replacement.
Step 2: Clean the Parts
Before you start assembling the mannequin, it's a good idea to clean the parts. Use the soft cloth to wipe down each part, removing any dust or debris that may have accumulated during shipping. This will not only make the mannequin look better but also ensure a smooth assembly process.
Step 3: Assemble the Torso
The torso is usually the largest and most important part of the mannequin. Start by identifying the front and back of the torso. Most buff mannequins have a more defined chest and abdominal area on the front. Once you've determined the front and back, look for the holes or slots where the arms and legs will attach.
Next, take one of the arms and align it with the corresponding hole or slot on the torso. You may need to use the pliers to hold the arm in place while you insert the screw. Use the Phillips head screwdriver to tighten the screw until the arm is securely attached to the torso. Repeat this process for the other arm.
Step 4: Attach the Legs
Now it's time to attach the legs. Similar to the arms, align each leg with the corresponding hole or slot on the torso. Use the pliers to hold the leg in place and insert the screw. Tighten the screw with the Phillips head screwdriver until the leg is firmly attached to the torso. Make sure the legs are straight and evenly spaced.
Step 5: Add the Head (if applicable)
Some buff mannequins come with a separate head that needs to be attached. If your mannequin has a head, look for the hole or socket on the top of the torso where the head will fit. Gently insert the head into the socket and make sure it's centered and secure.
Step 6: Check the Assembly
Once you've attached all the parts, take a step back and check the assembly. Make sure all the parts are securely attached and that the mannequin stands upright without wobbling. If you notice any loose parts or unevenness, use the screwdriver to tighten the screws or adjust the alignment.
Step 7: Dress the Mannequin
Now that your buff mannequin is fully assembled, it's time to dress it up! Choose the perfect outfit to showcase your products or create a cool display. You can find a variety of mannequins on our website, including Standard Ladies Mannequin, Mannequin To Sell Clothes, and Plus Size Full Body Female Mannequin.
Tips and Tricks
- Read the instructions: Even if you're a DIY pro, it's always a good idea to read the assembly instructions that come with the mannequin. The instructions may include specific details or tips that are unique to your particular model.
- Take your time: Assembling a mannequin can be a bit time-consuming, especially if it's your first time. Don't rush the process and make sure each part is properly attached before moving on to the next one.
- Ask for help: If you're having trouble assembling the mannequin or if you have any questions, don't hesitate to contact the supplier. They'll be happy to provide you with assistance and guidance.
Conclusion
Assembling a buff mannequin is a fun and rewarding project that can add a touch of style and sophistication to your store or collection. By following these steps and tips, you'll be able to assemble your mannequin like a pro in no time. If you're interested in purchasing a buff mannequin or any other type of mannequin, feel free to contact us for more information and to discuss your specific needs. We're here to help you create the perfect display for your products.
References
- General knowledge about mannequin assembly and product information from personal experience as a buff mannequin supplier.